Graph Organizers
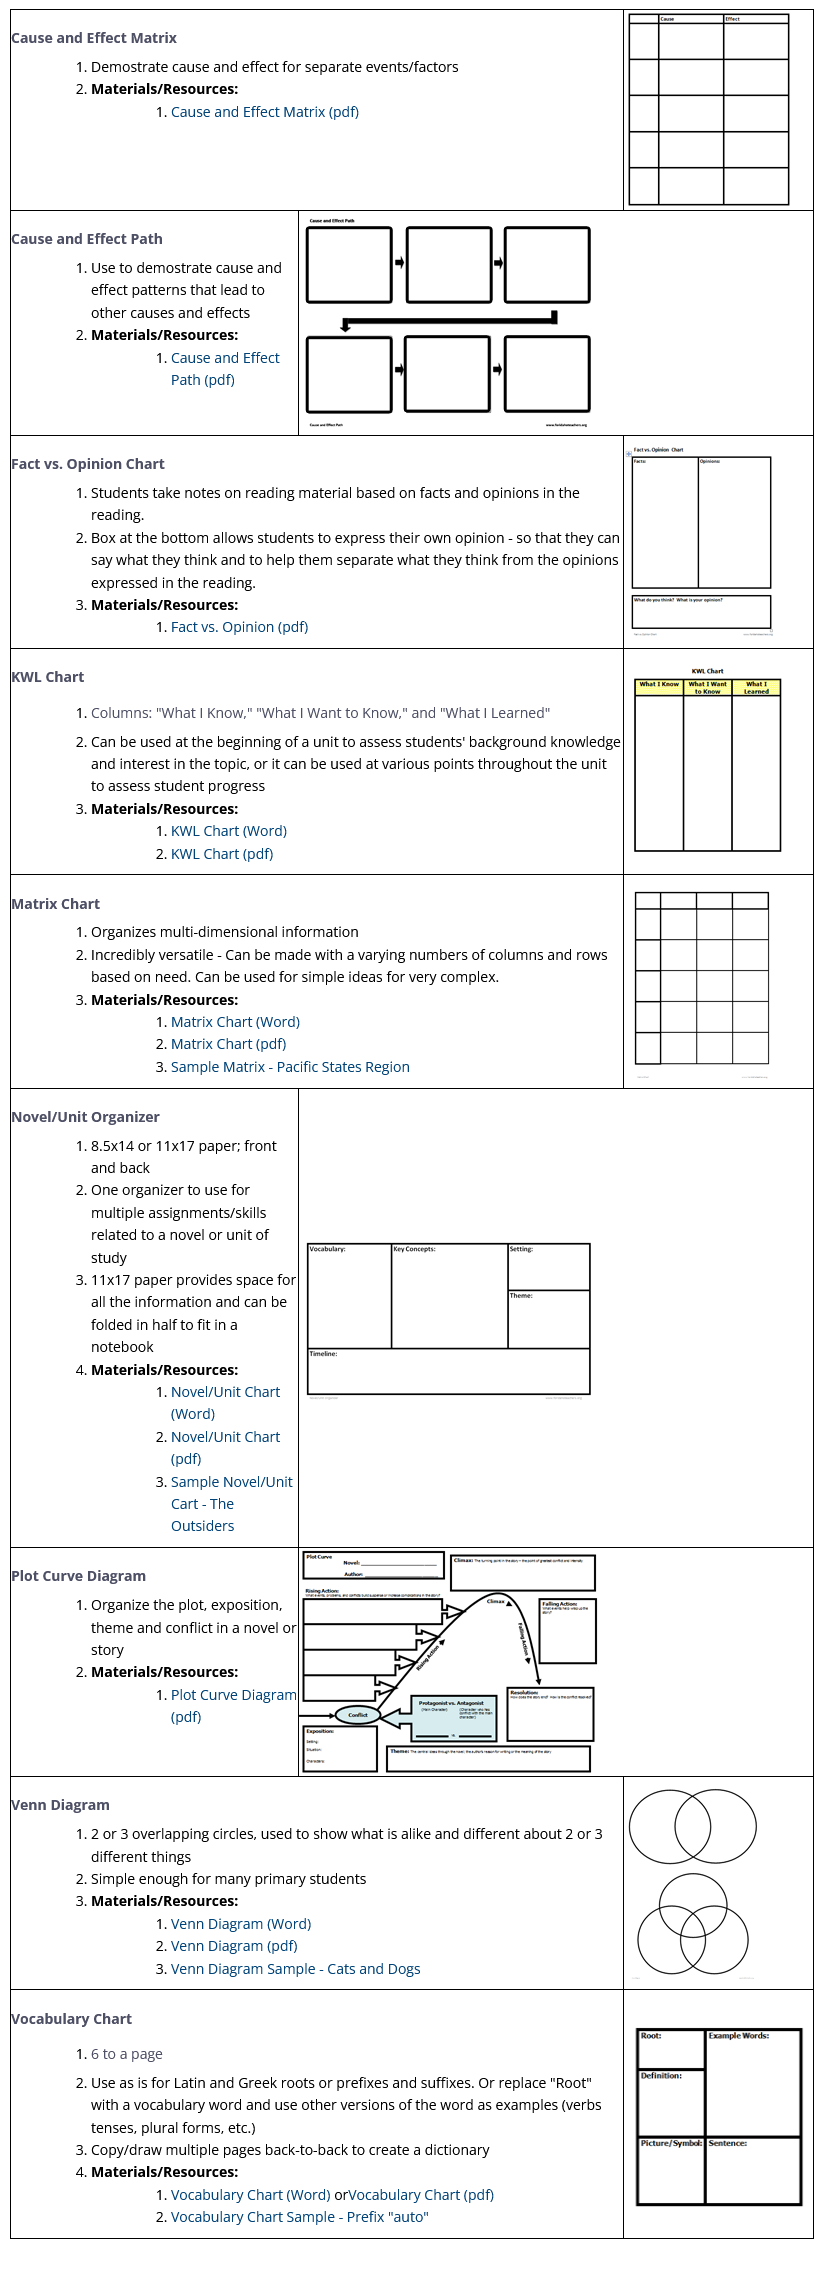
Graphic organizers are ways to organize information in a way that makes it more visible, more accessible, and easier to understand.
Student-Created Graphic Organizers
Graphic organizers are most effective when students make their own. Give students a sheet of blank paper and a sample graphic organizer (on the board or an overhead) and let them draw the lines and labels.
Advantages:
- No photocopies = Save time and money
- Students better understand the organizer and why it's set up the way that it is; it becomes more than just a worksheet to fill out.
- Teaches students the structure of the organizer, making it possible for them to use the organizer on their own in other classes
Tips:
- Have students draw the organizer as an Anchor Activity. Provide each student with a blank sheet of paper and show an example the the day's graphic organizer on the board or an overhead. Have students begin drawing the organizer as soon as they take their seats so that they are ready to use when class begins.
- Keep reams of blank 8.5x14 and 11x17 paper in your classroom to make larger organizers for more information.
- Use one organizer for a unit to collect information from multiple lessons - allows for reflection (information can be added, changed, revised), review and provides a means of study for a final assessment.
Graphic Organizers:

Documents
- Cause and Effect Matrix
- Cause and Effect Path
- Fact vs. Opinion
- KWL Chart
- KWL Chart-pdf
- Matrix Chart (pdf)
- Matrix Chart (Word)
- Sample Matrix - Pacific States Region
- Novel-Unit Chart (Word)
- Novel-Unit Chart (pdf)
- Sample Novel-Unit Cart - The Outsiders
- Plot Curve Diagram
- Venn Diagram (Word)
- Venn Diagram (pdf)
- Venn Diagram Sample - Cats and Dogs
- Vocabulary Chart
- Vocabulary Chart Sample - Prefix Auto
